


Drupal to WordPress Migration: How Will It Make A Difference?
In the early 2000s, Drupal was prioritized by every website owner and developer. Certainly, because it was the only ideal option for a Content Management System (CMS).
Till its inception, it has become the platform that is more preferred for businesses with a steep learning curve that requires consistent performance adjustments and rich hosting.
In addition, the backward compatibility among the visitors is a serious issue as the recent version upgrades essentially imply rebuilding of the website from scratch.
Instead of spending the resources for upgrading, the website owners like to stay with the outdated website that is more intended to attack. There are some who decide to move from their current Drupal version and like to migrate their websites to some different platform.
WordPress is the best option for Drupal website maintainers with general requirements. It has a user-friendly interface and smaller footprint, rich plugin ecosystem, and lower management overhead. Above all, there are many other features and functionalities that WordPress accumulates.
Migrating your existing Drupal website to WordPress is all you need now. With the impeccable benefits and features, WordPress Content Management System has, your website can secure higher traffic and more sales.
Here in this article, we will show you the suitable way to migrate Drupal to WordPress. The categorization is such that; initially, the pre-migration steps are defined, following the Migration of Drupal to WordPress and lastly, the post-migration steps are given. So, let's get started:
 We cannot deny that this plugin is very helpful and it makes the overall migration process easy.
Note: While using the online tools and plugins for automating the website migration, issues can occur. There are many chances that some of the content can be moved manually and you need to fix some issues after the migration process.
We cannot deny that this plugin is very helpful and it makes the overall migration process easy.
Note: While using the online tools and plugins for automating the website migration, issues can occur. There are many chances that some of the content can be moved manually and you need to fix some issues after the migration process.
 Several import tools are there in WordPress by default, Drupal does not have that. As we install the FG Drupal to WordPress plugin in the first step, it is shown in the table form below:
Search Drupal in the table and select Run Importer:
Several import tools are there in WordPress by default, Drupal does not have that. As we install the FG Drupal to WordPress plugin in the first step, it is shown in the table form below:
Search Drupal in the table and select Run Importer:
 It will navigate you to the web page where you can manage every option of the data migration.
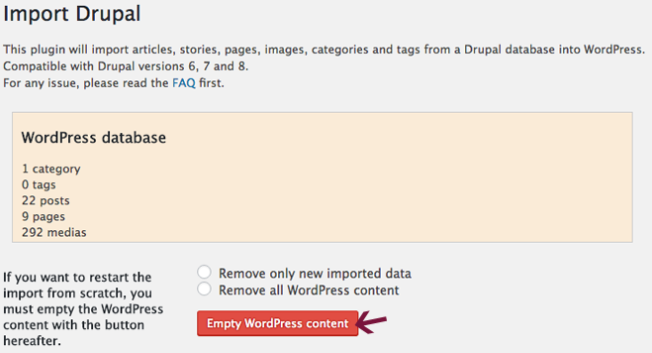 On the top, you will notice the "Empty WordPress content" button. If you make posts, pages, menus, tags, custom taxonomies or posts, categories, users, and comments, clicking on the button will remove them.
The different themes can be added to the website after completion of the migration process, simply use the default WordPress theme for now. It is useful to perfectly use the blank installation for migration. If you have already integrated the content to the website, back it up before you select the Empty WordPress content button.
On the top, you will notice the "Empty WordPress content" button. If you make posts, pages, menus, tags, custom taxonomies or posts, categories, users, and comments, clicking on the button will remove them.
The different themes can be added to the website after completion of the migration process, simply use the default WordPress theme for now. It is useful to perfectly use the blank installation for migration. If you have already integrated the content to the website, back it up before you select the Empty WordPress content button.
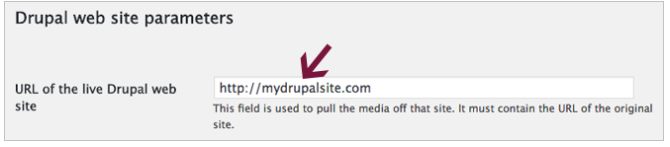 In the Drupal website metrics section, select the URL of the live Drupal website. It could be used to get the media items from the current website.
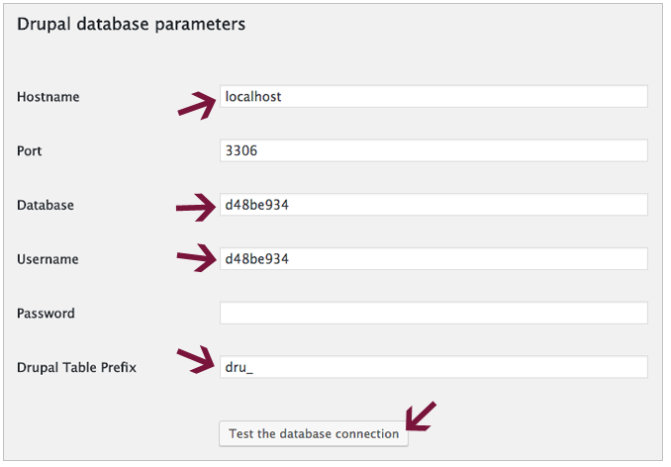 In the Drupal database parameters, you will require to paste the information of the old database that you need to copy from the settings.php file. Then, the below details are required, Hostname, Database name, Username, Password, and Drupal Table Prefix. After entering the details, you can select the Test database connection to assure its working.
 Here, we will move to the Behavior section. Now, you will mention the items that you will like to migrate to the Drupal pages and posts.
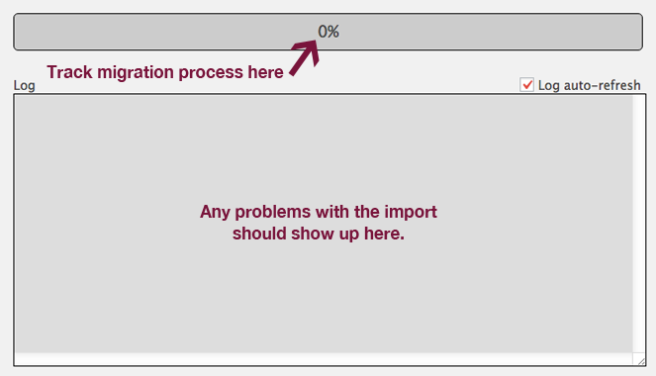 The bar above the page allows you to track the migration process, and the problems with the import to show the log box.
Note: You might like to leave the most items unchecked to control everything.
In several cases, we have found that executing the migration tasks manually is better while selecting the theme. Every website is different, and you will like to do everything to fit into the website layout.
The bar above the page allows you to track the migration process, and the problems with the import to show the log box.
Note: You might like to leave the most items unchecked to control everything.
In several cases, we have found that executing the migration tasks manually is better while selecting the theme. Every website is different, and you will like to do everything to fit into the website layout.
 As of now, you have successfully migrated the website to the new content management system. Now, you can select a similar template you were using on the Drupal until you pay the developer for creating the custom theme.
Many free themes are there in the WordPress theme repository. There are paid themes that are also there from different solo vendors and online marketplace. After researching, you will find the theme that suits the website's needs. While choosing the theme, assure that you are picking the one that has quality in mind.
Remember there are many bloated and poorly coded themes that you should not use at any cost. It is because of the reason that the theme you select has more impact on the website's overall performance, so, get only the best one. Look after the ratings and reviews of the theme you are planning to use and you will have a great idea if it is worth installing or not.
As of now, you have successfully migrated the website to the new content management system. Now, you can select a similar template you were using on the Drupal until you pay the developer for creating the custom theme.
Many free themes are there in the WordPress theme repository. There are paid themes that are also there from different solo vendors and online marketplace. After researching, you will find the theme that suits the website's needs. While choosing the theme, assure that you are picking the one that has quality in mind.
Remember there are many bloated and poorly coded themes that you should not use at any cost. It is because of the reason that the theme you select has more impact on the website's overall performance, so, get only the best one. Look after the ratings and reviews of the theme you are planning to use and you will have a great idea if it is worth installing or not.
 Decide, where you like to show the menus by choosing the approximate box in the Menu Settings and the Manage Locations tab.
 After deciding where to show the menu, do not neglect to select the Save Changes button. Now, look after the website to assure that your navigation menu is where it has to be.
Each theme has many default menu locations, so, look after the menus until you use them right.
After deciding where to show the menu, do not neglect to select the Save Changes button. Now, look after the website to assure that your navigation menu is where it has to be.
Each theme has many default menu locations, so, look after the menus until you use them right.
 If the contact forms on the Drupal website were in use, then you will require the recreation as well. It makes it easy for everyone to contact you for calls to action (CTAs) and newsletter signups.
Also, the auto responders for your forms can be easily configured and MailChimp can be used for connecting to the contact forms with the extra plugin. It makes it effortless to integrate subscribers to the email list.
For other marketing CTAs and newsletters, the forms can be created in the email marketing software (InfusionSoft, GetResponse, MailChimp, AWeber, and many more) and integrated into the website. The contact form plugin is the best choice for; Ninja Forms, WP Forms, Gravity Forms, Contact Forms, etc.
After creating and adding the contact forms to the website, it is better to know that they are executing adequately. Now, fill in the forms with the test information and assure you are getting the completed submissions.
If the contact forms on the Drupal website were in use, then you will require the recreation as well. It makes it easy for everyone to contact you for calls to action (CTAs) and newsletter signups.
Also, the auto responders for your forms can be easily configured and MailChimp can be used for connecting to the contact forms with the extra plugin. It makes it effortless to integrate subscribers to the email list.
For other marketing CTAs and newsletters, the forms can be created in the email marketing software (InfusionSoft, GetResponse, MailChimp, AWeber, and many more) and integrated into the website. The contact form plugin is the best choice for; Ninja Forms, WP Forms, Gravity Forms, Contact Forms, etc.
After creating and adding the contact forms to the website, it is better to know that they are executing adequately. Now, fill in the forms with the test information and assure you are getting the completed submissions.
 The widget is the content block could be integrated into the website's sidebar footer and more areas.
The widgets can be seamlessly added or removed from Appearance->Widgets and in the customize area even.
Below are some widgets that can be integrated into the website:
Image – Shows an image.
Audio – Displays an audio player.
Custom HTML – Displays HTML code.
Tag Cloud – Displays highly used tags.
Text – Intended to show HTML or text.
Custom Menu – Integrates a custom menu.
Pages – Displays a list of the website’s pages.
Content – Integrates images/text in the flexible grid.
Posts – Shows the website posts in the flexible grid.
Search – Shows an easy search form for the website.
Meta – Integrates RSS, login, and WordPress.org links.
Recent Posts – Shows the list of the most recent posts.
Categories – Integrate the dropdown or list of categories.
Archives – Integrates the monthly archive of the website’s posts.
Calendar – Shows the website’s posts visually in the calendar.
Contact Details & Maps – Displays the contact information and a map.
Recent Comments – Displays the website’s up-to-date comments.
RSS – Integrates the listing of entries from Atom feed or RSS.
Video – Displays the video from the video hosting website or media library.
Moreover, there are more themes as well that integrate the custom widgets. After the activation of the selected theme and deciding the functionality, you want to have on the website, use the widgets that fit with the particular needs.
The widget is the content block could be integrated into the website's sidebar footer and more areas.
The widgets can be seamlessly added or removed from Appearance->Widgets and in the customize area even.
Below are some widgets that can be integrated into the website:
Image – Shows an image.
Audio – Displays an audio player.
Custom HTML – Displays HTML code.
Tag Cloud – Displays highly used tags.
Text – Intended to show HTML or text.
Custom Menu – Integrates a custom menu.
Pages – Displays a list of the website’s pages.
Content – Integrates images/text in the flexible grid.
Posts – Shows the website posts in the flexible grid.
Search – Shows an easy search form for the website.
Meta – Integrates RSS, login, and WordPress.org links.
Recent Posts – Shows the list of the most recent posts.
Categories – Integrate the dropdown or list of categories.
Archives – Integrates the monthly archive of the website’s posts.
Calendar – Shows the website’s posts visually in the calendar.
Contact Details & Maps – Displays the contact information and a map.
Recent Comments – Displays the website’s up-to-date comments.
RSS – Integrates the listing of entries from Atom feed or RSS.
Video – Displays the video from the video hosting website or media library.
Moreover, there are more themes as well that integrate the custom widgets. After the activation of the selected theme and deciding the functionality, you want to have on the website, use the widgets that fit with the particular needs.
 While building the WordPress website, below plugins can be installed:
BackWPup – Quickly schedule partial and full backups and store them in the cloud.
Yoast SEO – Allow you to configure the website for optimized on-page SEO.
W3 Total Cache – Aids you to accelerate the site by caching dynamic pages to help static ones.
Wordfence – Definitely saves the website from malicious activity.
Additional Information- While integrating the plugins to the new website, use as much as you can (but, do not use the redundant one). Before installing the plugins, go through the reviews, and look when it was last updated.
Usually, only the activated plugins are used. More of the time, you require the plugin on a temporary basis. In certain cases, you have to install the plugin, execute the task and then, deactivate and delete the plugin quickly. There is no sense to keep up the plugins that are not in use.
While building the WordPress website, below plugins can be installed:
BackWPup – Quickly schedule partial and full backups and store them in the cloud.
Yoast SEO – Allow you to configure the website for optimized on-page SEO.
W3 Total Cache – Aids you to accelerate the site by caching dynamic pages to help static ones.
Wordfence – Definitely saves the website from malicious activity.
Additional Information- While integrating the plugins to the new website, use as much as you can (but, do not use the redundant one). Before installing the plugins, go through the reviews, and look when it was last updated.
Usually, only the activated plugins are used. More of the time, you require the plugin on a temporary basis. In certain cases, you have to install the plugin, execute the task and then, deactivate and delete the plugin quickly. There is no sense to keep up the plugins that are not in use.
 In the WordPress dashboard from the broken link checker widget
 And, in the Tools->broken links.
The broken links can get updated easily from the interface rather than moving to the source to fix everything. These plugins can be kept even after updating every link. Besides, it is better to uninstall it and prefer to use the online tool.
Even, if you want to have the broken link checker plugin, then assure deactivation of it usually. Activating it on a regular basis is best to review for the broken links.
And, in the Tools->broken links.
The broken links can get updated easily from the interface rather than moving to the source to fix everything. These plugins can be kept even after updating every link. Besides, it is better to uninstall it and prefer to use the online tool.
Even, if you want to have the broken link checker plugin, then assure deactivation of it usually. Activating it on a regular basis is best to review for the broken links.
Pre-Migration Steps
Before migrating the content, you have to take care of some things. Below we have mentioned the pre-migration steps, find out below:-
Web Hosting
-
Create a Temporary Domain
-
Making a List of Current URLs
-
Installation of the Self-hosted WordPress
Get your Drupal site converted today with WordSuccor
Migration of Drupal to WordPress: Step by Step
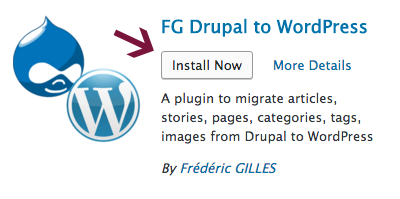
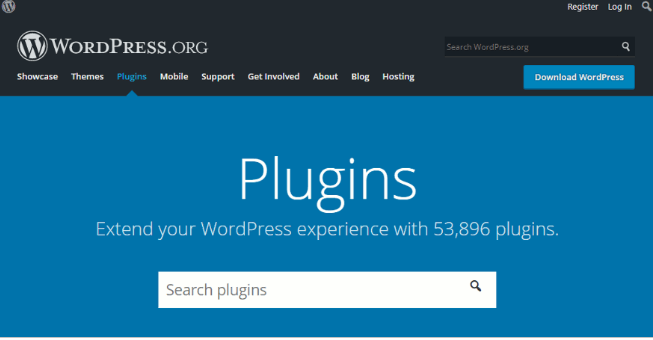
After installing WordPress, let's get started with the migration process. We advise you to use the free version for the migration, even though there is a premium version as well. With the premium version, you can move the custom post fields, post types, and the WordPress taxonomies.Step 1 Installation of FG Drupal to WordPress Plugin
Move to Plugins->Add New in the WordPress dashboard. Search the FG Drupal to WordPress. Choose the Install Now button and Activate it after installation.
We cannot deny that this plugin is very helpful and it makes the overall migration process easy.
Note: While using the online tools and plugins for automating the website migration, issues can occur. There are many chances that some of the content can be moved manually and you need to fix some issues after the migration process.
Step 2 Perceiving the Drupal Database Details
After the installation and activation of the plugin, you have to get the Drupal database measures that you will use to migrate the website data to WordPress. Details, such as database name, hostname, username, password, and the drupal table prefix, are needed. To get this information, you have to visit settings.php file with the FTP client. Our advice to you is to use Filezilla, but there are other choices as well. Below steps can be used to get the database parameters.- First of all, download the FTP client of your choice and install it later.
- Then, move to the website default directory.
- Now, use the settings.php file.
- Copy the database name, hostname, username, password, and Drupal table prefix.
- Now, Paste all in the text file and save for later.
Step 3 Importing Drupal Content to WordPress
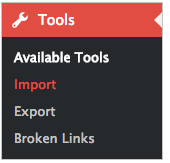
Migrating the website from Drupal to WordPress is the same as other migration processes. And, now, you are all- equipped to migrate the Drupal to the WordPress website. In the WordPress dashboard, move to Tools->Import in the left sidebar.
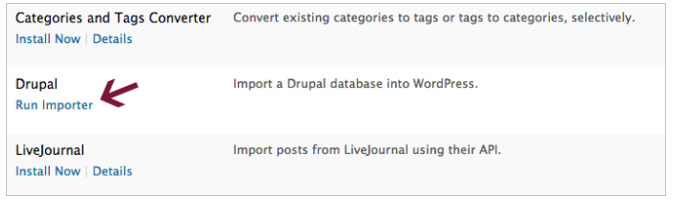
Several import tools are there in WordPress by default, Drupal does not have that. As we install the FG Drupal to WordPress plugin in the first step, it is shown in the table form below:
Search Drupal in the table and select Run Importer:
It will navigate you to the web page where you can manage every option of the data migration.
On the top, you will notice the "Empty WordPress content" button. If you make posts, pages, menus, tags, custom taxonomies or posts, categories, users, and comments, clicking on the button will remove them.
The different themes can be added to the website after completion of the migration process, simply use the default WordPress theme for now. It is useful to perfectly use the blank installation for migration. If you have already integrated the content to the website, back it up before you select the Empty WordPress content button.
In the Drupal website metrics section, select the URL of the live Drupal website. It could be used to get the media items from the current website.
In the Drupal database parameters, you will require to paste the information of the old database that you need to copy from the settings.php file. Then, the below details are required, Hostname, Database name, Username, Password, and Drupal Table Prefix. After entering the details, you can select the Test database connection to assure its working.
Here, we will move to the Behavior section. Now, you will mention the items that you will like to migrate to the Drupal pages and posts.
-
Import Report
-
Media
Option 1: Manual
For the full optimization of the web images, it is better to download all from the Drupal website manually. So, save the media items by dropping them to the folder on the PC. Then, save images by right-clicking on PC or control-clicking on Apple. By every image on the PC, the images can be sized to fit on the new theme and provide them with detailed file names and assure that they are ready for the web.Option 2: Automated
If the Drupal website is huge, with several posts and pages, then, you will likely save and insert the images manually. In this case, the media items can be imported into the migration process. Here, our recommendation to you is to whichever method you will use, consider the image optimization plugin for reducing the image file sizes. After configuring everything on a perfect scale, you can select the Resume or start the import button and start with the migration process.
The bar above the page allows you to track the migration process, and the problems with the import to show the log box.
Note: You might like to leave the most items unchecked to control everything.
In several cases, we have found that executing the migration tasks manually is better while selecting the theme. Every website is different, and you will like to do everything to fit into the website layout.
Post-Migration Steps
Now, the content has been transferred to WordPress, here comes the time to move to the post-migration step.# Selecting a Theme
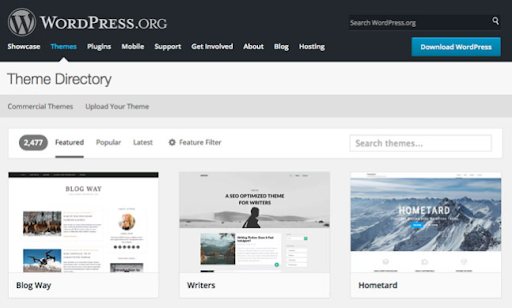
As of now, you have successfully migrated the website to the new content management system. Now, you can select a similar template you were using on the Drupal until you pay the developer for creating the custom theme.
Many free themes are there in the WordPress theme repository. There are paid themes that are also there from different solo vendors and online marketplace. After researching, you will find the theme that suits the website's needs. While choosing the theme, assure that you are picking the one that has quality in mind.
Remember there are many bloated and poorly coded themes that you should not use at any cost. It is because of the reason that the theme you select has more impact on the website's overall performance, so, get only the best one. Look after the ratings and reviews of the theme you are planning to use and you will have a great idea if it is worth installing or not.
# Building Navigation Menus
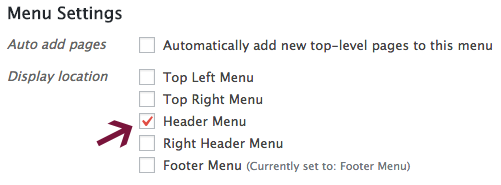
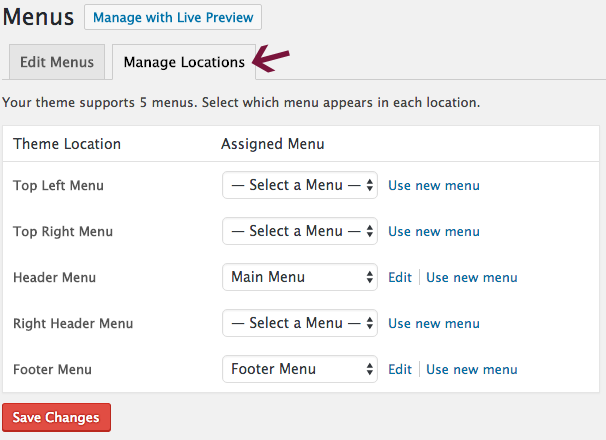
After migrating the content, you will require to recreate several items, such as menus you were considering. It is important that your website must have a well-organized main menu. Hence, the visitors can navigate easily on the website and discover what they are searching for. WordPress has everything that made it easy to build a new menu. Just visit the Appearance->Menus, and put a name for the new menu and then, select the Save Menu button. Now, integrate the posts, pages, custom links, and some more items to it. After creating the new menu, and you can mention where you will want it to look on the website. The themes use many names for the Main Manu, such as Header Menu or Top menu or something different.
Decide, where you like to show the menus by choosing the approximate box in the Menu Settings and the Manage Locations tab.
After deciding where to show the menu, do not neglect to select the Save Changes button. Now, look after the website to assure that your navigation menu is where it has to be.
Each theme has many default menu locations, so, look after the menus until you use them right.
# Setting up Contact Forms
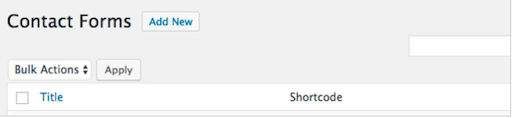
If the contact forms on the Drupal website were in use, then you will require the recreation as well. It makes it easy for everyone to contact you for calls to action (CTAs) and newsletter signups.
Also, the auto responders for your forms can be easily configured and MailChimp can be used for connecting to the contact forms with the extra plugin. It makes it effortless to integrate subscribers to the email list.
For other marketing CTAs and newsletters, the forms can be created in the email marketing software (InfusionSoft, GetResponse, MailChimp, AWeber, and many more) and integrated into the website. The contact form plugin is the best choice for; Ninja Forms, WP Forms, Gravity Forms, Contact Forms, etc.
After creating and adding the contact forms to the website, it is better to know that they are executing adequately. Now, fill in the forms with the test information and assure you are getting the completed submissions.
# Adding Widgets
The widget is the content block could be integrated into the website's sidebar footer and more areas.
The widgets can be seamlessly added or removed from Appearance->Widgets and in the customize area even.
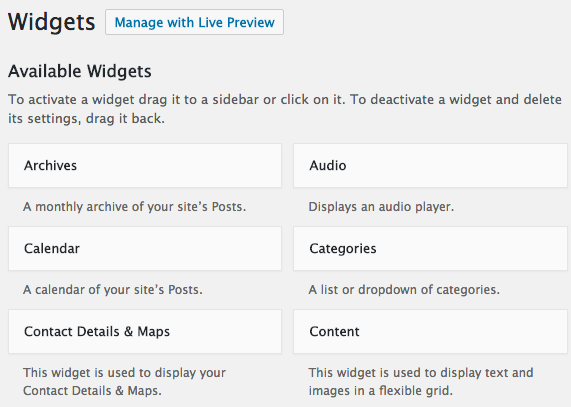
Below are some widgets that can be integrated into the website:
Image – Shows an image.
Audio – Displays an audio player.
Custom HTML – Displays HTML code.
Tag Cloud – Displays highly used tags.
Text – Intended to show HTML or text.
Custom Menu – Integrates a custom menu.
Pages – Displays a list of the website’s pages.
Content – Integrates images/text in the flexible grid.
Posts – Shows the website posts in the flexible grid.
Search – Shows an easy search form for the website.
Meta – Integrates RSS, login, and WordPress.org links.
Recent Posts – Shows the list of the most recent posts.
Categories – Integrate the dropdown or list of categories.
Archives – Integrates the monthly archive of the website’s posts.
Calendar – Shows the website’s posts visually in the calendar.
Contact Details & Maps – Displays the contact information and a map.
Recent Comments – Displays the website’s up-to-date comments.
RSS – Integrates the listing of entries from Atom feed or RSS.
Video – Displays the video from the video hosting website or media library.
Moreover, there are more themes as well that integrate the custom widgets. After the activation of the selected theme and deciding the functionality, you want to have on the website, use the widgets that fit with the particular needs.
# Integrating the Image Galleries
Does Drupal's website have photo galleries? If yes, then you have to develop them now for migration purposes. WordPress itself supports galleries, but they are not user-friendly, so they cannot improve the work well. Several themes have built-in gallery functionality, and you might like to use the plugin. Many free galleries plugins are there that can be used for many websites. The gallery plugins like WP Canvas, Envira Gallery, Portfolio Gallery etc that could be used.Get the Best custom WordPress Plugin for your Website Today
# Installation of Essential Plugins
The main thing because of which WordPress is outstanding is different plugins you can integrate into the website for every functionality.
While building the WordPress website, below plugins can be installed:
BackWPup – Quickly schedule partial and full backups and store them in the cloud.
Yoast SEO – Allow you to configure the website for optimized on-page SEO.
W3 Total Cache – Aids you to accelerate the site by caching dynamic pages to help static ones.
Wordfence – Definitely saves the website from malicious activity.
Additional Information- While integrating the plugins to the new website, use as much as you can (but, do not use the redundant one). Before installing the plugins, go through the reviews, and look when it was last updated.
Usually, only the activated plugins are used. More of the time, you require the plugin on a temporary basis. In certain cases, you have to install the plugin, execute the task and then, deactivate and delete the plugin quickly. There is no sense to keep up the plugins that are not in use.
# Updation of the Permalink Structure
Obviously, you require the new website to get fully-organized, so assure you are using the concise and short permalink structure. There is a possibility that you might be using the genuine URLs of the traditional website. If you, then use a similar structure. And, if you are updating the permalinks and are getting a considerable amount of traffic, then it is better to use the redirects to the new website URLs. Here, the redirection plugin can be used. Also, if your existing website does not receive the utmost traffic and is awful, then, do not spare time in developing redirects. Even though, keep yourself focused on securing the quality visitors to the improved and new WordPress website.Making your Site Live
This step requires you to migrate the content from the temporary domain (that you have created for installing WordPress for the migration) for the permanent domain. If the web hosts are changed, then, you will have to update the DNS settings with the domain name registration. If they do not have any idea of how to use it, then just search on google "name of the registrar+update DNS" or look out for the tech support. When the website propagates, then, you have to make the live website. Use these steps below:- Update DNS while switching to the web hosts.
- Keep the backup of the development website.
- Migrate the MySQL database tables of the development site.
- Upload your development website.
- Get a new MySQL database, and get note of every detail, such as username, password, and database name.
- Edit the wp.config file to show the new MySQL database details.
- Make your development MySQL database tables into your new database.
# Redirection of the Existing URLs (If required)
With the existing Drupal website URLs, now, you can redirect it similar to the WordPress website. You can download and activate the redirection plugin, then, below steps could be used:- Use the old post/page URL in the source URL area.
- Address the new post/page URL in the target URL area.
- Select the Add Redirection button.
- Iterate as required with all posts/pages you wish to redirect.
# Monitoring and fixing the Internal Links
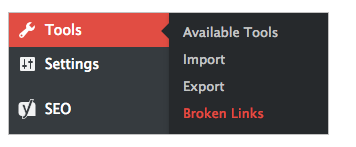
If you want to update the permalink structure in the migration process, you will have to look at the website's internal links. Visit each post and page for editing the links to some other content on the website. Do not prefer to do everything manually. Here, the broken link checker plugin will assist you. Install it, activate it, and let it make the difference. It will monitor the website posts, pages, comments, and some other content. The broken link checker will detect the broken links, it will show them in two places:
In the WordPress dashboard from the broken link checker widget
And, in the Tools->broken links.
The broken links can get updated easily from the interface rather than moving to the source to fix everything. These plugins can be kept even after updating every link. Besides, it is better to uninstall it and prefer to use the online tool.
Even, if you want to have the broken link checker plugin, then assure deactivation of it usually. Activating it on a regular basis is best to review for the broken links.
Hire us to Get High Quality WordPress Migration Services